Are you ready to upgrade your bathroom with a luxurious new shower? Installing a shower drain in a concrete floor is an important step that shouldn’t be skipped.
Don’t worry, though – we’ll take you through everything you need to know about how to install a shower drain in your concrete floor in this blog post.
From gathering the necessary materials and equipment to making sure everything is properly sealed, we’ve got all the tips and tricks for ensuring success!
Installing a shower drain in a concrete floor may seem daunting at first, but with the right tools and knowledge, it’s actually quite simple.
In this blog post, we’ll break down exactly what you need to do in order to install a shower drain in your concrete floor, from obtaining supplies to sealing it tight.
Contents
- 1 Types of Shower Drains
- 2 Preparing the Concrete Floor for Installation
- 3 Installing the Drain in the Concrete Floor
- 4 Connecting the Drain to the Plumbing System
- 5 Finishing Touches on the Installation
- 6 Troubleshooting Common Problems with Shower Drains in Concrete Floors
- 7 Tips for Maintaining a Properly Installed Shower Drain in a Concrete Floor
- 8 Conclusion
Types of Shower Drains
The drain is one of the most important features to consider. There are many types of shower drains to choose from, each with their own unique benefits.
Linear drains are the most popular type and are typically used in modern and contemporary bathrooms. They feature a long, narrow channel that runs along the length of the shower space, allowing for easy water drainage and a sleek, minimalistic look.
Point drains are often used in showers with a central drain location. These typically come in round or square shapes and feature a removable strainer to keep debris out of the pipes.
Tile insert drains are perfect for those who want to blend in with their surrounding tile work. These can be customized to match any style and come in both linear and point varieties.
No-hub drains provide an easy installation solution as they don’t require any additional parts or tools. They also feature an integrated strainer to keep debris out of the pipes and come in both linear and point styles.
Preparing the Concrete Floor for Installation
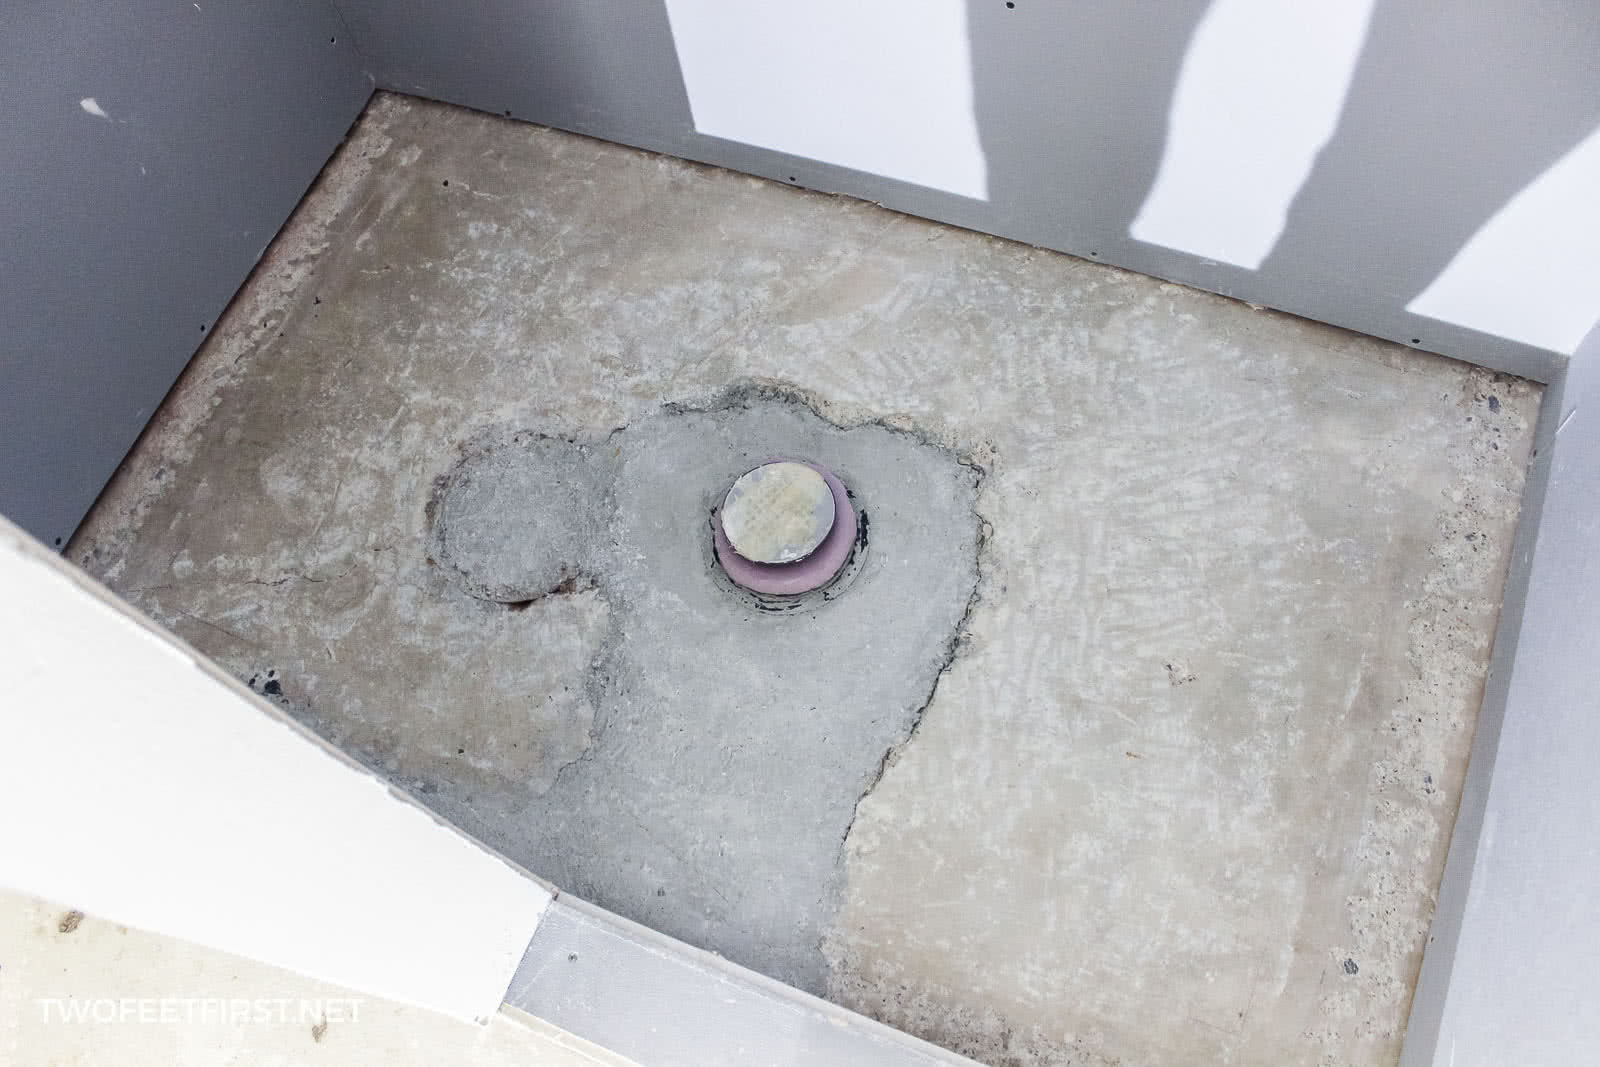
Before you get started, it’s important to properly prepare the concrete floor. This includes cleaning and smoothing the surface, as well as removing any debris or dirt.
Additionally, make sure to check for any cracks or damage in the concrete that could cause water to leak out of the drain. If there are any cracks or damage, they must be filled in with a patching compound before installation can begin.
Once the floor is prepped, mark where the drain will go by drawing a circle around it with a pen or marker. This will help guide you during installation.
Installing the Drain in the Concrete Floor
Installing a shower drain into a concrete floor may seem like a daunting task, but with the right tools and know-how, it can be done quickly and easily. Begin by measuring the length of your shower base to map out the drain area.
Then, use a masonry drill bit to carefully drill a hole in the concrete floor, taking care not to damage any pipes or wires beneath the surface.
Next, insert your drain into the hole and seal it with waterproof sealant before securing it in place with screws or bolts. Finally, attach your shower base and connect it to your plumbing system according to local codes and regulations.
Connecting the Drain to the Plumbing System
It’s not as difficult as it seems! Follow these easy steps, and you’ll be done in no time.
First, attach the drain pipe to the trap. Make sure that the connection is secure and leak-free. Then, connect the drain pipe to the main drain line. To guarantee a watertight seal, use a sealant for extra protection.
Finally, test for leaks by running water through the system. If no leaks are detected, you’re all set!
When dealing with plumbing equipment, safety should always be your top priority. Wear protective gear and use proper tools whenever possible.
Finishing Touches on the Installation
Installing a drain is an important part of any home improvement project, but it’s not complete until the finishing touches are taken care of. To ensure a watertight seal, you’ll need to seal the drain with concrete sealant.
This should be applied along the edges and all around it, taking care that there are no cracks or gaps that could lead to water leakage.
Once the sealant has dried, use a vacuum cleaner or broom and dustpan to remove any excess material.
Finally, check for any leaks around the drain before testing it out by running some water through it.
Doing this will guarantee that your unit is properly sealed and ready for use.
Troubleshooting Common Problems with Shower Drains in Concrete Floors
Troubleshooting common problems with shower drains in concrete floors can be tricky, but with a few tips and tricks, you’ll be able to get it sorted.
First and foremost, check for leaks.
If the sealant around the drain isn’t secure, water can leak and cause damage to the surrounding area.
Make sure all of the connections are properly sealed to prevent any leaks.
Clogs can also occur if debris gets stuck in the pipes or if they aren’t connected correctly. If this is the case, you may need to use a snake or auger to remove any blockages and restore flow to your drain.
Finally, look out for cracks in the concrete floor near your drain. These cracks can allow water to leak into your bathroom or shower area, creating a huge mess! Repair any cracks as soon as possible before they become worse and cause more damage.
Tips for Maintaining a Properly Installed Shower Drain in a Concrete Floor
It is critical to keep a properly installed shower drain in a concrete floor in order to keep your bathroom safe and functional.
Here are some tips to help you keep your shower drain in great shape for years to come.
First, regularly inspect the drain and the surrounding area for any signs of damage, such as cracks in the concrete or other structural issues.
To ensure that the drain is watertight, use a sealant around its edges.
Additionally, use a waterproofing membrane between the shower pan and the concrete floor to prevent moisture from seeping through and causing damage over time.
It’s also important to clean out any debris that may have accumulated in the drain on a regular basis to ensure proper drainage and reduce blockages.
If there are any signs of mold or mildew, use an appropriate cleaner to remove them immediately before they have a chance to spread further and cause more damage.
Furthermore, make sure all plumbing fixtures are properly connected and sealed with plumber’s tape before using them for bathing or showering purposes.
Finally, it’s recommended that you have a professional plumber inspect your shower drain installation periodically to make sure it is functioning correctly.
There are no potential problems that could arise from improper installation or maintenance practices.
Conclusion
Want to upgrade your bathroom and make it more luxurious? Installing a shower drain into a concrete floor is the way to go. This blog post has all the information you need for a successful installation.
We’ll cover what materials and equipment you’ll need, different types of drains, how to prepare the floor, connecting the drain and connecting it to your plumbing system, sealing the drain, and common issues that can arise with shower drains in concrete floors.
Plus, we’ll give advice on how to clean them properly.


